

How To Get A Gradient Border In Photoshop
In this tutorial, nosotros'll larn how to draw gradients in Photoshop! At that place are many places within Photoshop where gradients are used. The Gradient Tool, for instance, lets united states of america draw gradients across layers or selections, or beyond layer masks to create smooth transitions from 1 layer to another.
We can fill text and shapes with gradients. We can colorize a photo using a Gradient Map image adjustment, or add together color effects with a Gradient Overlay layer style, and more! Gradients are invaluable in Photoshop, and they're a corking style to add more interest and life to what would take been a flat-looking image or design.
In this tutorial, we'll cover the basics of how to draw gradients using the simplest (and possibly the most useful) of Photoshop's slope-related features, the Gradient Tool. We'll expect at other ways of applying gradients in other tutorials, but you lot'll discover that they all piece of work essentially the same style, and so one time you've learned the basics with the Slope Tool, you'll exist able to accept advantage of all the other gradient features that Photoshop has to offer!
Along with learning how to draw gradients, we'll also await at how to select from Photoshop's many preset gradients using the Slope Picker, including how to load boosted gradient sets that are included with Photoshop. We'll await at different slope styles that we tin depict, and nosotros'll await at a few of the more unremarkably-used gradients, including what may be the near useful 1 of all, the default Foreground to Background gradient!
In one case we've learn the basics of how to draw gradients, in the next tutorial, we'll learn how to edit and save our ain custom gradients using Photoshop's Slope Editor.
I'll be using Photoshop CC hither merely this tutorial is besides fully uniform with Photoshop CS6. Let'southward get started!
Cartoon Gradients In Photoshop
Creating A New Document
Let's showtime by creating a new Photoshop document. To do that, I'll go upwards to the File carte du jour in the Card Bar forth the meridian of the screen and choose New:
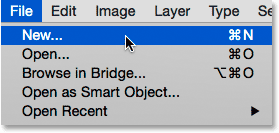
Going to File > New.
This opens the New dialog box. For this tutorial, I'll prepare the Width of my certificate to 1200 pixels and the Height to 800 pixels. There's no particular reason why I'm using this size, and then if you're working forth with me and accept a unlike size in mind, feel free to use it. I'll leave the Resolution value fix to its default of 72 pixels/inch, and I'll make sure Background Contents is set to White. I'll click OK when I'k done to close out of the dialog box, at which betoken a new white-filled document appears on the screen:
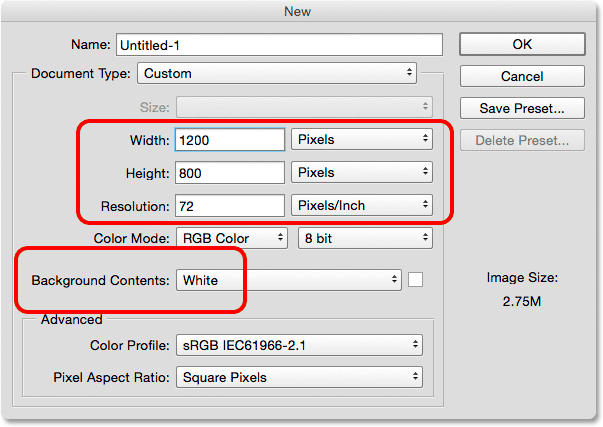
The New dialog box.
Selecting The Gradient Tool
Photoshop's Gradient Tool is found in the Tools panel forth the left of the screen. I'll select it by clicking on its icon. You tin also select the Slope Tool only by pressing the letter of the alphabet Thou on your keyboard:
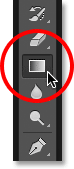
Selecting the Slope Tool from the Tools panel.
The Gradient Picker
With the Slope Tool selected, the adjacent thing we need to do is choose a slope, and there'due south a couple of ways we tin can practice that. One is past opening Photoshop'south Gradient Picker; the other is past opening the larger Gradient Editor. The difference between the two is that the Gradient Picker but allows us to choose from prepare-made preset gradients, while the Gradient Editor, as its name implies, is where we tin can edit and customize our own gradients. For this tutorial, we'll focus on the Gradient Picker itself. We'll learn all well-nigh the Gradient Editor in the next tutorial.
When you only want to choose ane of Photoshop's preset gradients, or 1 that you've previously created on your ain and saved every bit a custom preset (again, we'll larn how to do that in the next tutorial), click on the small arrow to the right of the slope preview bar in the Options Bar. Brand certain you click on the arrow itself, non on the preview bar (clicking the preview bar will open the Gradient Editor and we don't want to go there but yet):
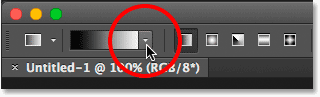
Clicking the arrow to open the Gradient Picker.
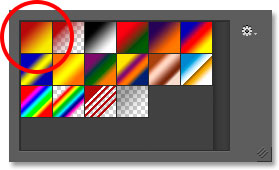
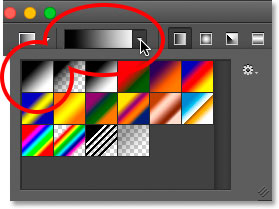
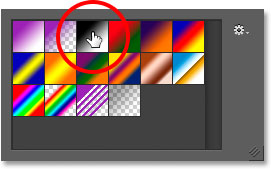
Clicking the arrow opens the Gradient Picker, with thumbnails of all the preset gradients we can cull from. To cull a gradient, click on its thumbnail, and so press Enter (Win) / Return (Mac) on your keyboard, or click on any empty space in the Options Bar, to shut the Gradient Picker. You can also double-click on the thumbnail, which will both select the gradient and close out of the Gradient Picker:
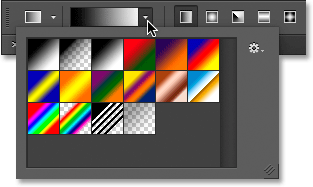
The Gradient Picker.
Loading More Gradients
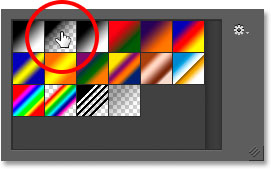
By default, only a small number of preset gradients are available, but Photoshop includes other gradient sets that we can choose from. All we need to do is load them in. To do that, click on the gear icon in the upper right:
Clicking the gear icon in the Slope Picker.
If you await in the bottom half of the bill of fare that appears, you'll observe the list of additional gradient sets, each based on a specific theme, like colour harmonies, metals, pastels, and more. If you're a lensman, the Neutral Density and Photographic Toning gradients are particularly useful:
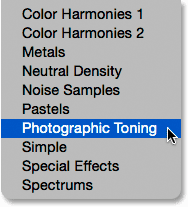
The other gradient sets we can choose from.
To load any of the sets, click on its proper noun in the list. I clicked on the Photographic Toning set. Photoshop will ask if you lot desire to supervene upon the current gradients with the new ones. If yous click Append, rather than replacing the original gradients, it will simply add the new ones below the originals. Every bit we'll see in a moment, it's easy to restore the originals, so I'll click OK to replace them with the Photographic Toning ready:
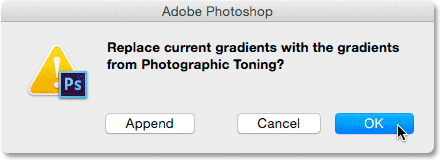
Clicking OK to supersede the original gradients with the new set.
And now, we run into in the Gradient Picker that the original gradients have been replaced with the Photographic Toning gradients. To learn more about the Photographic Toning set and how to use it, cheque out our complete Photographic Toning Presets tutorial:
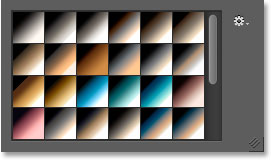
The original gradients have been replaced with the new ready.
Restoring The Default Gradients
To keep united states focused on the basics, we'll stick with the original default gradients for now. To restore them, click again on the gear icon in the Gradient Picker:
Clicking the gear icon.
Then choose Reset Gradients from the carte:
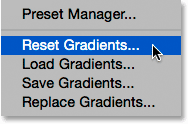
Choosing "Reset Gradients".
Photoshop will ask if you desire to replace the current gradients with the defaults. Click OK:
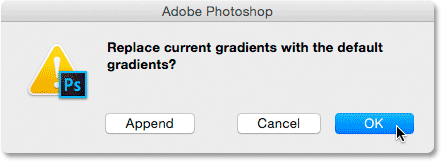
Replacing the current gradients with the defaults.
And now, we're dorsum to the originals:
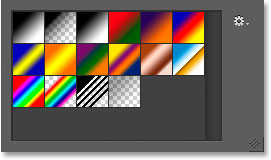
The default gradients have been restored.
The Foreground To Background Gradient
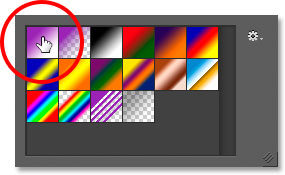
Earlier we learn how to draw gradients, permit's apace await at ane gradient in particular - the Foreground to Background slope. It's the one that Photoshop selects for the states by default, but you lot can also select information technology manually if y'all need to by clicking on its thumbnail (first one on the left, peak row):
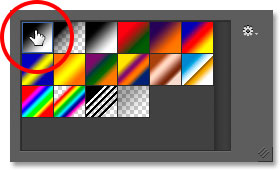
Selecting the Foreground to Background slope.
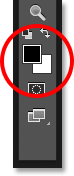
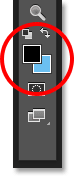
As you may have guessed, the Foreground to Background slope gets its colors from your Foreground and Background colors. You lot can come across your current Foreground and Groundwork colors in the color swatches near the bottom of the Tools panel. The swatch in the upper left shows the Foreground color, and the one in the lower right shows the Background color. Past default, the Foreground color is set to black and the Background color is set to white:
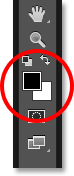
The current Foreground (upper left) and Background (lower right) colors.
Since information technology's based on your current Foreground and Background colors, the Foreground to Background gradient is the easiest of all the gradients to customize and the 1 that oft proves most useful. Let'due south use it to help us learn how to actually describe a gradient, and along the way, we'll encounter how easy it is to alter its colors to whatever nosotros need!
Drawing A Gradient With The Gradient Tool
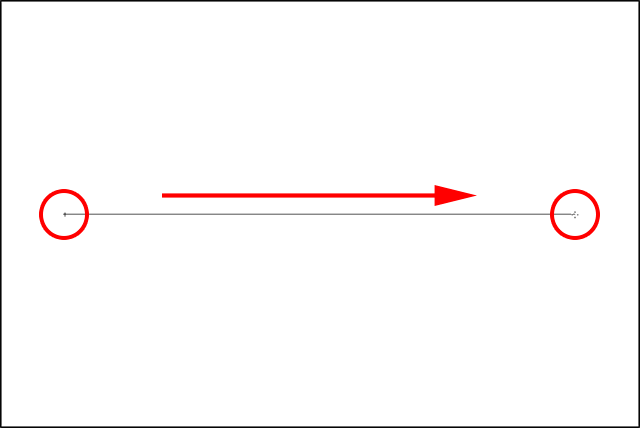
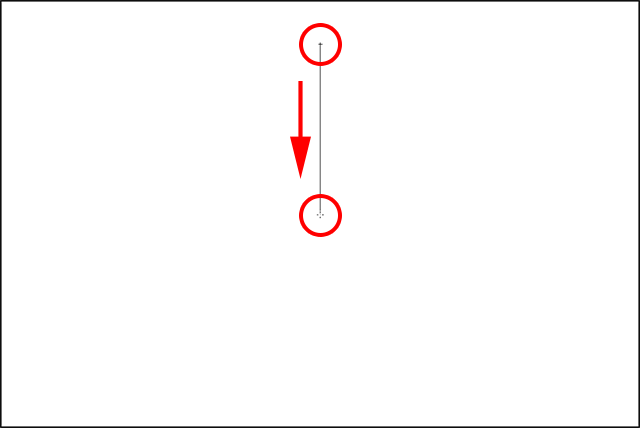
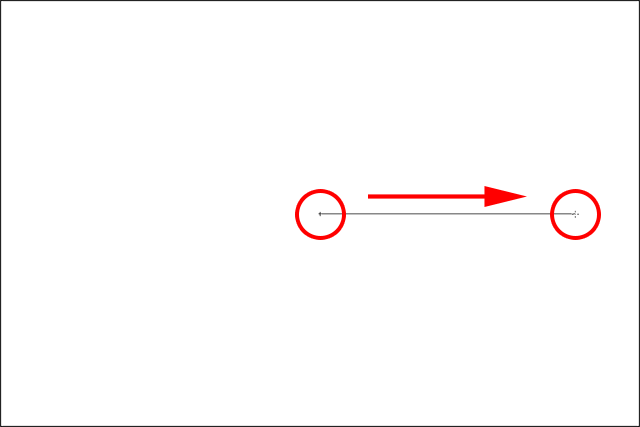
Cartoon a gradient with the Gradient Tool in Photoshop is as easy as clicking and dragging your mouse. Simply click in your document to ready a starting point for the gradient, then keep your mouse push held downwardly and drag away from the starting point to where you want the gradient to finish. As you're dragging, you lot'll run into only a thin line indicating the direction of the slope. When you release your mouse push, Photoshop completes the gradient and draws it with your chosen colors.
For case, I'll click on the left side of my document, then with my mouse push still held down, I'll drag over to the right side. Observe that so far, all we can see is a thin line between the starting point and the end betoken. If you want to get in easier to draw a perfectly horizontal gradient, printing and concord your Shift key equally you're dragging, which will limit the angle in which y'all can elevate. Just remember to wait until after you've released your mouse button before releasing the Shift key or information technology won't piece of work:
Clicking and dragging (with the mouse button held down) from one side of the certificate to the other.
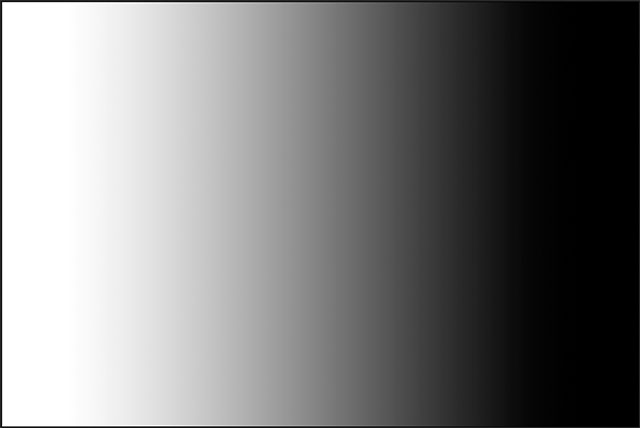
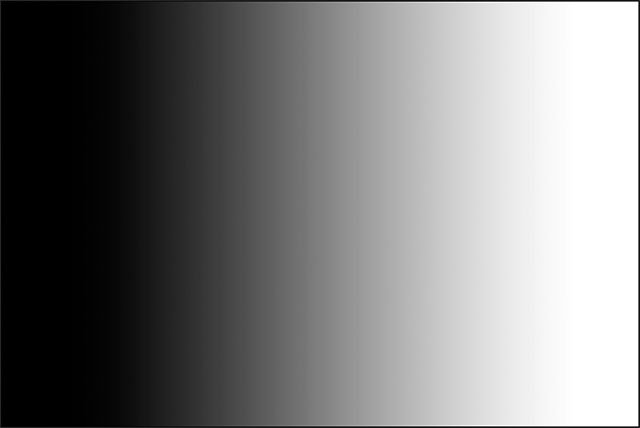
When I release my mouse push, Photoshop draws the slope. Since my Foreground color was set to black and my Background color was set to white, I end up with a black to white gradient:
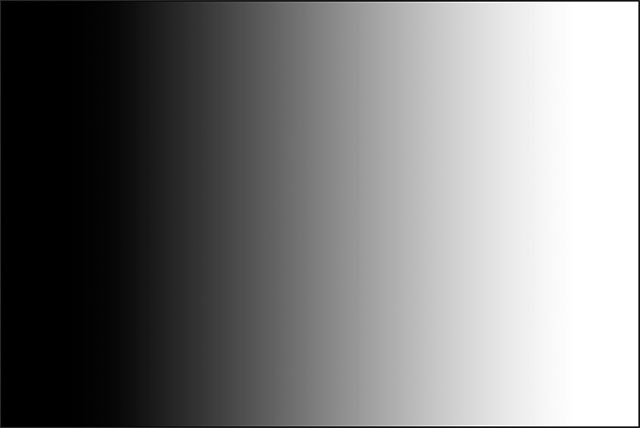
Photoshop draws the slope when y'all release your mouse push button.
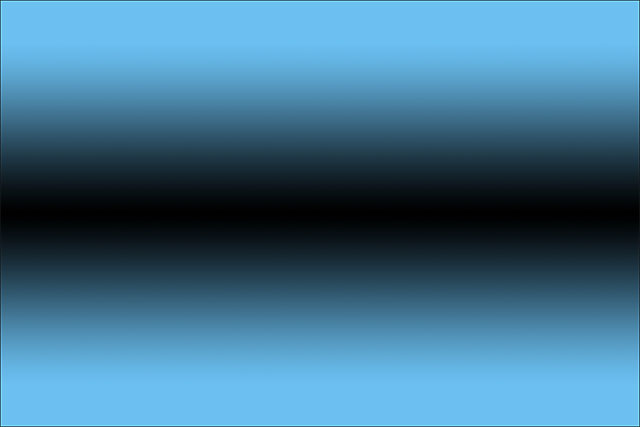
Reversing The Colors
Y'all can reverse the colors in your gradient past selecting the Reverse pick in the Options Bar:
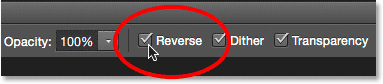
Selecting "Reverse" in the Options Bar.
With Contrary selected, if I draw the exact same gradient, we see that this time, the colors announced on reverse sides, with white on the left and blackness on the right. This is a handy characteristic, simply just make sure to uncheck the Reverse option when you're done, otherwise the adjacent gradients you draw will likewise be reversed:
The same slope equally before but with the colors reversed.
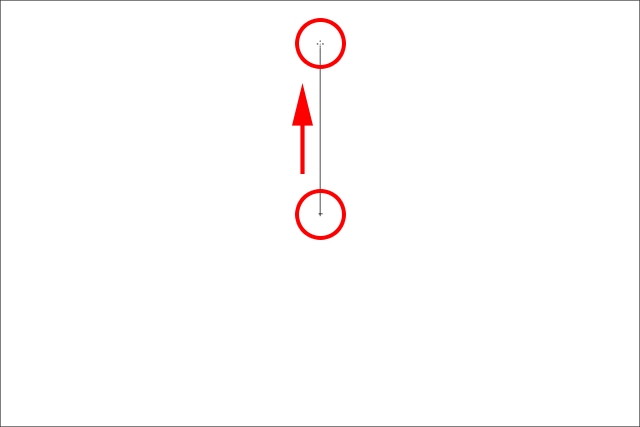
Of course, gradients don't demand to run horizontally like this. They can run in any direction yous choose. I'll draw another gradient, this fourth dimension from top to bottom. Notice that I don't need to disengage or delete my existing gradient. Photoshop will only replace the current gradient with the new ane. I'll click nigh the pinnacle of my document, then proceed my mouse button held downwardly and elevate down towards the lesser. Merely equally with drawing a horizontal gradient, it's much easier to draw a vertical slope if you printing and hold your Shift key as you're dragging, making sure to wait until after y'all've released your mouse button earlier releasing the Shift key. Here again, we see only a thin outline at first:
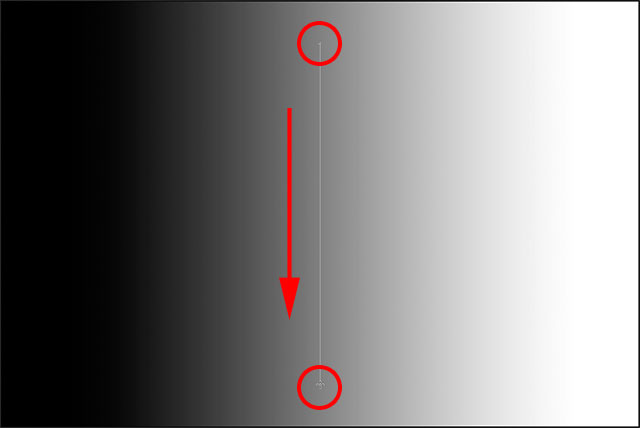
Clicking and dragging out a vertical gradient from top to bottom.
When I release my mouse button, Photoshop completes the gradient, replacing the initial horizontal one with a vertical black to white gradient:
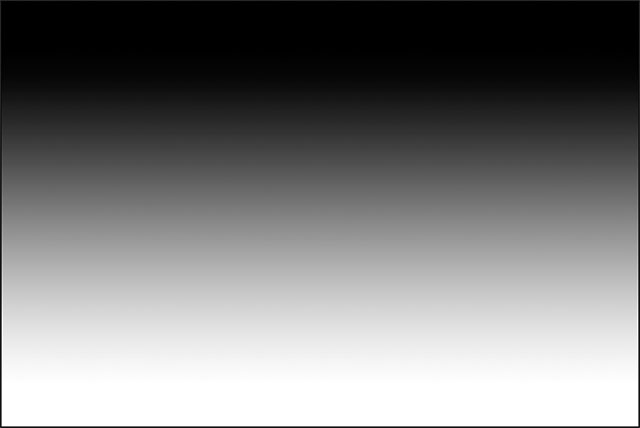
The new black to white vertical slope.
Changing The Default Slope's Colors
Since the default gradient gets its colors from the current Foreground and Background colors, all we need to do to modify the colors of the gradient is select different colors for the Foreground and Background. For example, I'll choose a different Foreground color by clicking on the Foreground color swatch in the Tools panel (the 1 that's currently prepare to blackness):
Clicking the Foreground color swatch.
This opens Photoshop'south Colour Picker. I'll select carmine for my new Foreground color, and so I'll click OK to shut out of the Color Picker:
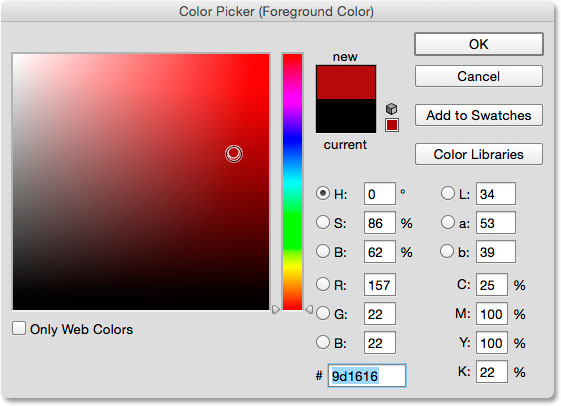
Choosing red for the new Foreground colour.
Next, I'll change my Background color by clicking its colour swatch (the one currently filled with white):
Clicking the Groundwork color swatch.
This in one case over again opens the Color Picker. I'll change the Groundwork color from white to a brilliant yellow, then I'll OK to close out of the Color Picker:
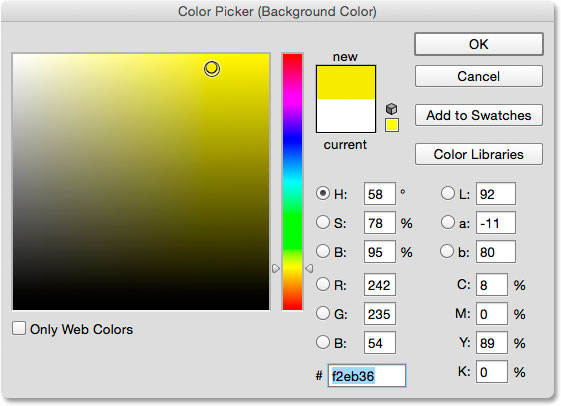
Choosing yellow for the new Background color.
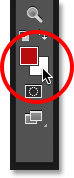
Observe that the color swatches take updated to show the new colors I've chosen for the Foreground and Background:
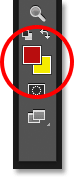
The swatches have updated with the new colors.
The slope preview bar in the Options Bar has also updated to show me what the new slope colors will look similar:
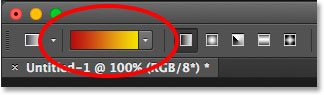
The slope preview bar e'er shows the current slope colors.
I'll depict the slope, this time diagonally, by clicking in the bottom left of my certificate and dragging to the upper right. Over again, there's no need to undo or delete the previous gradient. Photoshop will replace it with the new one:
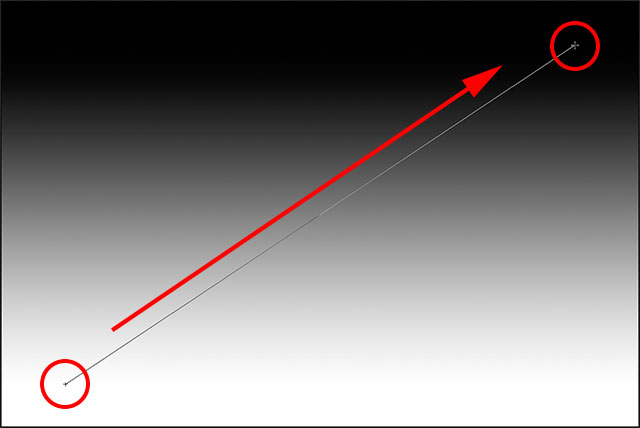
Cartoon the new gradient from the bottom left to the upper correct of the document.
When I release my mouse button, Photoshop draws the red to xanthous gradient diagonally across the document:
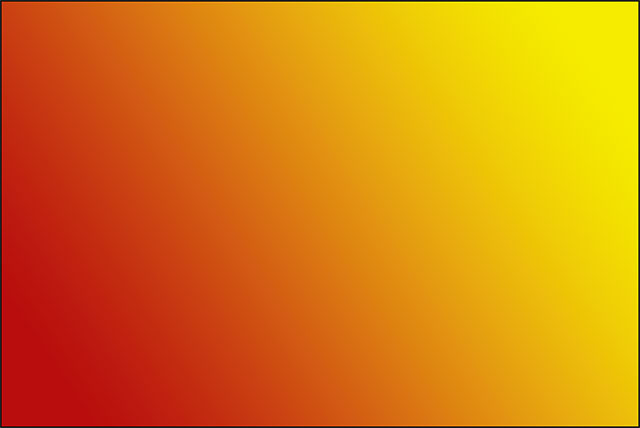
The new reddish to yellow diagonal gradient.
Resetting The Foreground And Background Colors
Detect that if I open my Slope Picker in the Options Bar, the Foreground to Background gradient's thumbnail is likewise showing my new reddish and xanthous colors:
The updated Foreground to Groundwork thumbnail in the Slope picker.
You lot tin can change the colors for this gradient any time you like past clicking on the Foreground and/or Background color swatches in the Options Bar and choosing different colors. But if yous need to apace reset the colors dorsum to their defaults, making the Foreground color black and the Background color white, simply press the letter D (recall "D" for "Defaults") on your keyboard. You lot'll see the swatches in the Tools panel revert back to the default black and white:
The Foreground and Background swatches take been reset.
And y'all'll meet that both the gradient preview bar in the Options Bar and the Foreground to Background gradient'southward thumbnail in the Gradient Picker are in one case once again showing the default colors:
Everything is now back to the way it was initially.
Cartoon A Gradient On Its Ain Layer
If we expect in my Layers panel, we run into that up to this bespeak, I've been drawing my gradients direct on the Background layer:
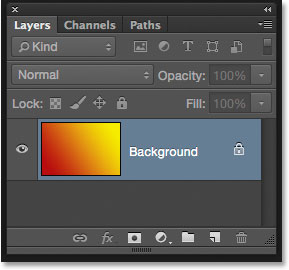
The Layers panel showing the gradient on the Background layer.
Drawing on the Background layer may be fine for our purposes hither, but a much improve way to work in Photoshop is to take reward of layers and identify each detail in our document on its ain dissever layer. To do that, I'll first clear away my gradient by going up to the Edit card at the top of the screen and choosing Fill:
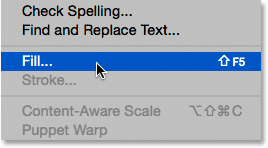
Going to Edit > Make full.
When the Fill up dialog box opens, I'll set the Contents option at the pinnacle to White, then I'll click OK. This fills the Background layer with white:
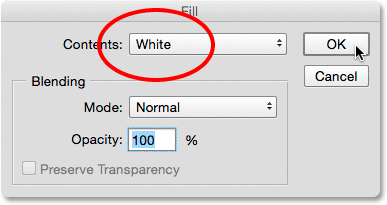
The Make full dialog box.
Side by side, I'll add a new layer for my gradient past pressing and belongings the Alt (Win) / Choice (Mac) central on my keyboard and clicking the New Layer icon at the bottom of the Layers panel:
Pressing and holding Alt (Win) / Selection (Mac) while clicking the New Layer icon.
Calculation the Alt (Win) / Option (Mac) key while clicking the New Layer icon tells Photoshop to first open up the New Layer dialog box where we tin proper noun the layer before it's added. I'll proper name my layer "Slope", then I'll click OK:
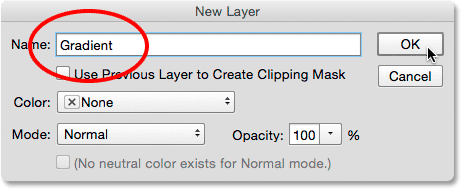
The New Layer dialog box.
Photoshop adds a new bare layer named "Slope" to a higher place the Groundwork layer. I can now draw my slope on this new layer and go along it split from everything else (even though "everything else" in this example is really just the Background layer, but it's however a good workflow addiction to get into):
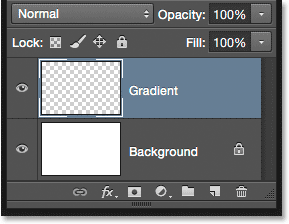
I now have a split up layer for my gradient.
The Transition Expanse
1 thing that's very important to empathize when it comes to drawing gradients is that it's not just the direction in which yous drag that matters; the distance betwixt your starting and stop points also matters.
The reason is that what you're really cartoon with the Gradient Tool, along with the direction of the gradient, is the transition surface area betwixt the colors. The distance you elevate from your starting point to your cease point determines the size of the transition area. Longer distances will give you smoother, more gradual transitions, while shorter distances will create harsher, more than abrupt transitions.
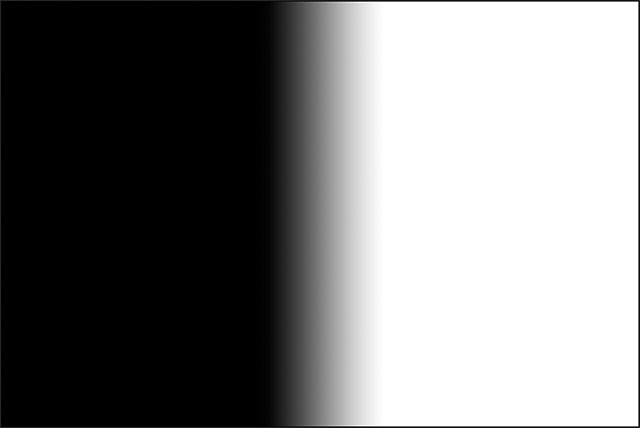
To show you lot what I mean, I'll apply the Foreground to Background gradient set to its default black and white. Offset, I'll draw a gradient from left to right, starting from most the left edge of the document and ending near the right border. The area between my starting and end points will become the transition expanse between my two colors (in this instance, black and white):
Drawing a gradient with a wide transition area.
I'll release my mouse button to let Photoshop depict the gradient, and because at that place was such a broad gap betwixt my starting and stop points, we're seeing a smooth, very gradual transition betwixt black on the left and white on the right:
A slope with a gradual transition between the colors.
I'll disengage the gradient, just to make things easier to see, by going up to the Edit menu at the elevation of the screen and choosing Undo Slope. I could also press Ctrl+Z (Win) / Control+Z (Mac) on my keyboard:
Going to Edit > Undo Gradient.
This time, I'll depict my slope in the same management (left to correct) simply with a much smaller gap between my starting and end points:
Cartoon a gradient with a narrow transition expanse.
When I release my mouse button, we see that while this gradient was drawn in the same management equally the one earlier, the transition betwixt black on the left and white on the right is much more than sudden and precipitous. As we can encounter, the distance betwixt your starting and end points is every bit as important every bit the management when it comes to the overall appearance of the gradient:
A similar gradient but with a much smaller transition area.
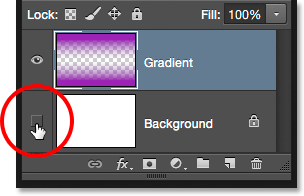
Earlier we motion on, permit's take a quick expect in my Layers panel where nosotros run across that, considering I added a new layer before, my gradient is now existence drawn on the split "Gradient" layer rather than on the Background layer. Again, it'southward not a huge issue in this case, simply getting into the habit of keeping everything on its own layer will make working with Photoshop so much easier:
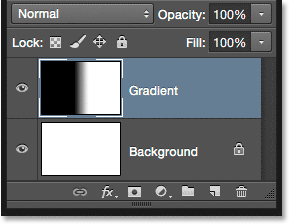
The gradient now sits on its own layer higher up the Background layer.
The Foreground to Transparent Gradient
So far, we've looked mainly at Photoshop'south default Foreground to Groundwork gradient, merely another one that's often very useful is the Foreground to Transparent gradient, and information technology'due south worth looking at considering it behaves a bit differently than the others. I'll select it from the Gradient Picker by double-clicking on its thumbnail. Y'all'll find information technology directly beside the Foreground to Background thumbnail:
Choosing the Foreground to Transparent slope.
The Foreground to Transparent gradient is like to the Foreground to Background gradient in that it gets its color from your current Foreground color, which means yous tin can easily change it by choosing a different Foreground color. What makes it special, though, is that there is no second colour. Instead, it transitions from a single color into transparency.
I'll undo my electric current slope by going up to the Edit carte and choosing Undo Gradient. Then, I'll choose a color by clicking on the Foreground colour swatch in the Tools panel. At the moment, it's ready to blackness:
Clicking the Foreground color swatch.
When the Color Picker opens, I'll choose purple, and then I'll click OK:
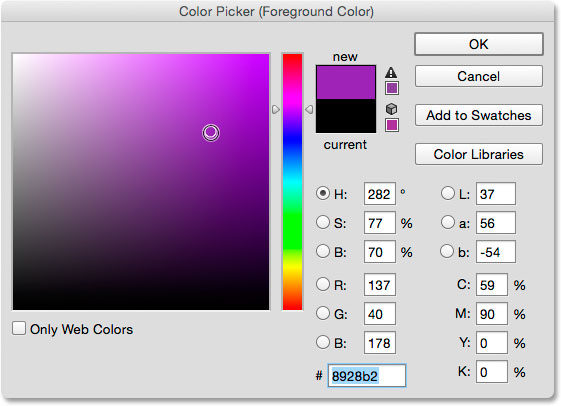
Choosing imperial every bit the new Foreground colour.
With my Foreground color now set up to purple, we run across in the gradient preview bar in the Options Bar that I'll be drawing a purple to transparent gradient (the checkerboard pattern you can see backside the regal is how Photoshop represents transparency):
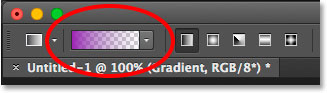
The gradient will at present run from royal to transparent.
I'll draw a vertical gradient from about the elevation of my certificate downward to the middle:
Drawing a vertical Foreground to Transparent gradient downwards through the top half of the document.
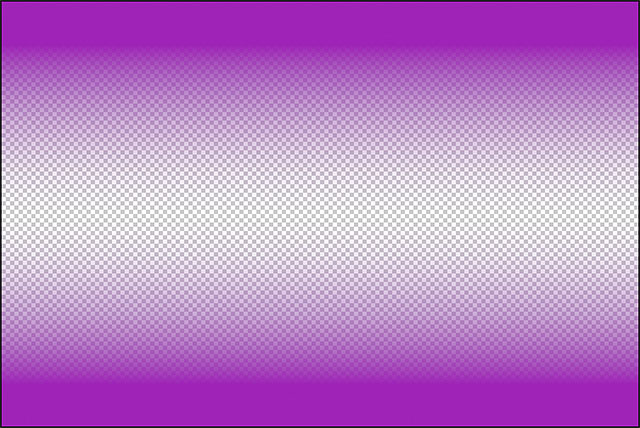
When I release my mouse button, information technology looks like what I've drawn is a basic purple to white slope. However, the white we're seeing is actually from the Background layer beneath the gradient. Information technology's not part of the gradient itself:
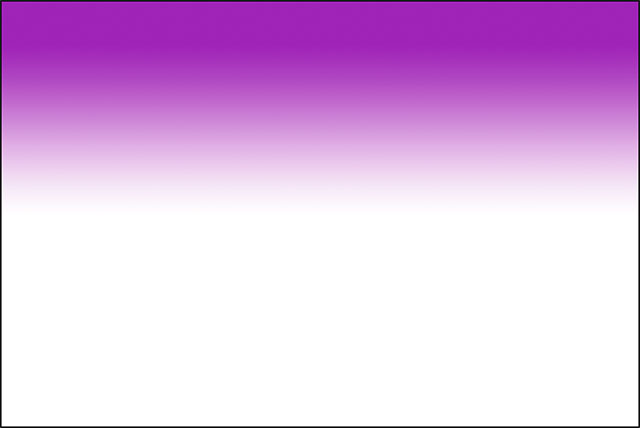
The purple is from the gradient, merely the white is from the background below it.
To prove information technology, I'll temporarily plough off my Background layer by clicking on its visibility icon (the eyeball icon) in the Layers panel:
Turning off the Background layer.
This hides the white background in the document, revealing just the gradient itself, and at present nosotros tin can conspicuously see that it'due south really a majestic to transparent gradient. Again, the checkerboard pattern is how Photoshop represents transparency:
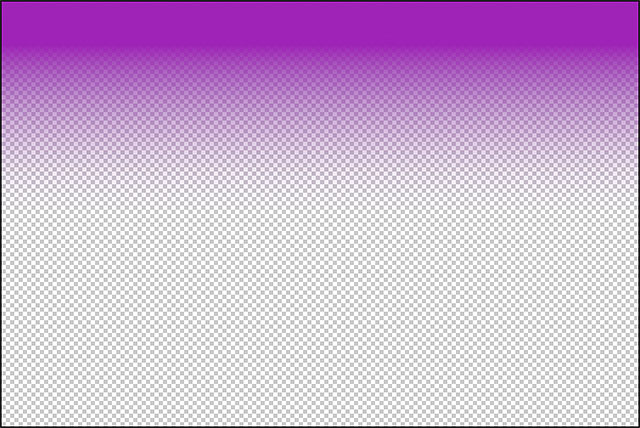
The bodily imperial to transparent gradient.
Some other reason why the Foreground to Transparent gradient is different from the others is that Photoshop does not overwrite the previous Foreground to Transparent gradient if we draw some other ane over top of it. Instead, it simply adds the new gradient to the original. I'll draw a 2d Foreground to Transparent gradient, this time from about the bottom of the document upward to the center:
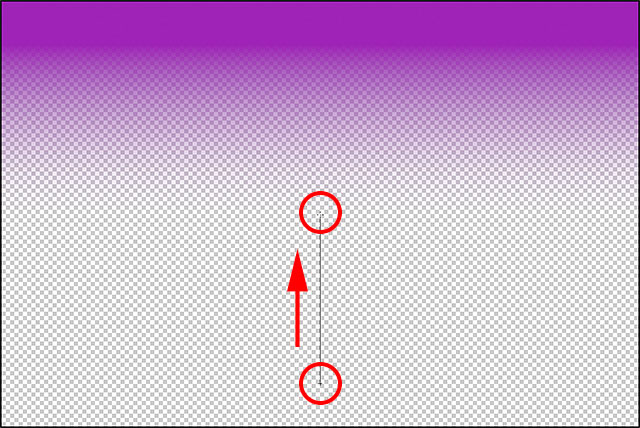
Calculation a 2d Foreground to Transparent gradient.
I'll release my mouse push, and rather than overwriting my original slope, Photoshop adds my second one to it. If I drew a third or fourth gradient (maybe one from the left and the other from the right) it would add those ones as well:
Both Foreground to Transparent gradients have been merged together.
I'll plow my Background layer back on in the document by clicking in one case once again on its visibility icon:
Turning the Background layer on.
And now we're back to seeing what looks like a royal to white (to royal) slope, even though we know that the white is really only the Groundwork layer showing through the transparency:
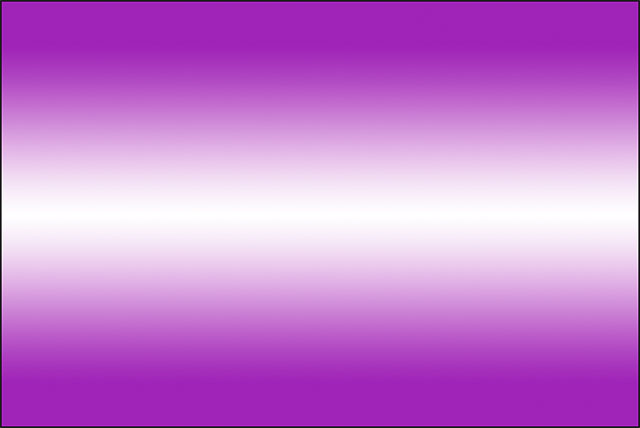
The aforementioned gradient with the Background layer turned on.
The Transparency Option
The Foreground to Transparent slope in Photoshop is peachy for things similar concealment the edges of a photograph, or darkening the sky in an image to bring out more detail (which we'll see how to exercise in another tutorial). But for the transparency role to work, yous demand to make sure the Transparency choice in the Options Bar is selected:
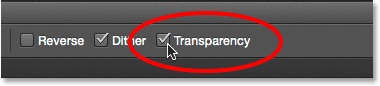
Make sure Transparency is turned on when drawing a gradient that uses transparency.
If the Transparency option is turned off when drawing a Foreground to Transparent gradient, all you'll end up doing is filling the layer or selection with your chosen Foreground color:
With the Transparency option turned off, Photoshop tin can't draw the transparent part of the gradient.
The Black, White Gradient
Nosotros won't go through every gradient that we tin can choose from in Photoshop (since you can easily practise that on your ain), but if you demand to describe a black to white gradient and your Foreground and Background colors are currently set to something other than black and white, just catch the Black, White slope from the Gradient Picker (third thumbnail from the left, top row). Different the Foreground to Background gradient, the Black, White gradient will always draw a black to white slope regardless of your electric current Foreground and Background colors:
The Black, White slope'southward thumbnail.
The Gradient Styles
So far, we've seen examples of gradients that transition in a straight line from the starting point to the stop point. This type of slope is known as a linear gradient, merely it's actually merely one of five dissimilar gradient styles we can choose from in Photoshop.
If yous expect to the right of the gradient preview bar in the Options Bar, you'll see the v Slope Style icons. Starting from the left, we have Linear, Radial, Angle, Reflected, and Diamond:
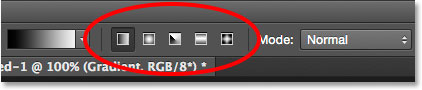
The Linear, Radial, Bending, Reflected, and Diamond gradient mode icons.
Let's see what each of these gradient styles can practice. I'll printing Ctrl+Alt+Z (Win) / Command+Selection+Z (Mac) a few times on my keyboard to disengage my previous steps until I'1000 dorsum to seeing only a white-filled document. And then, I'll switch dorsum to the Foreground to Groundwork gradient by selecting it in the Slope Picker:
Choosing the Foreground to Background gradient.
I'll press the alphabetic character D on my keyboard to reset my Foreground and Groundwork colors dorsum to black and white. Then, just to continue things interesting, I'll change my Background color from white to a light blue:
My latest Foreground and Background colors.
Linear
The default gradient style in Photoshop is Linear, but yous can select information technology manually if you need to by clicking the first icon on the left:
Selecting the Linear gradient manner.
Nosotros've already seen several examples of the linear style, which draws the gradient from the starting signal to the terminate point in a straight line based on the direction in which yous dragged. Selecting Reverse in the Options Bar volition swap the society of the colors:

An example of a standard linear gradient.
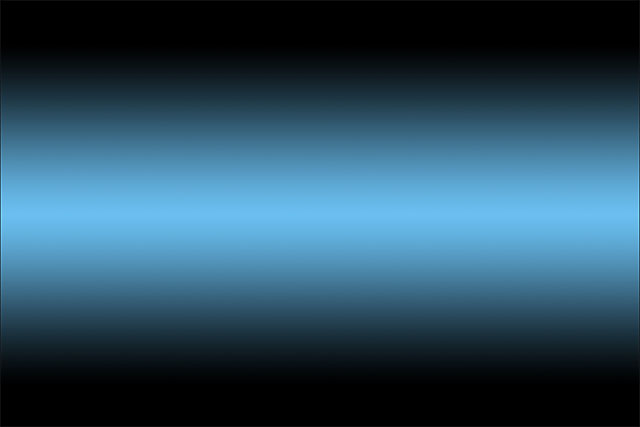
Radial
The Radial style (2d icon from the left) will draw a circular gradient outward from your starting point:
Selecting the Radial gradient mode.
I'll undo my linear gradient past pressing Ctrl+Z (Win) / Command+Z (Mac) on my keyboard. To draw a radial gradient, I'll click in the center of my certificate to gear up the starting point, and so I'll elevate outward towards the edge:
Drawing a radial gradient from the center of the certificate.
I'll release my mouse push button, and here we see what the radial slope looks like. It begins with my Foreground colour (black) at my starting bespeak in the center and moves outward in all directions as it transitions into my Background color (blue):
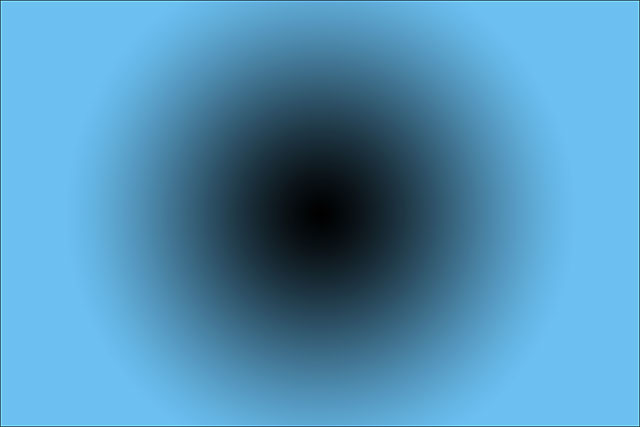
The radial gradient.
If I had selected the Reverse selection in the Options Bar, the colors would be reversed, starting with blue in the center and transitioning outward in a round fashion into black:
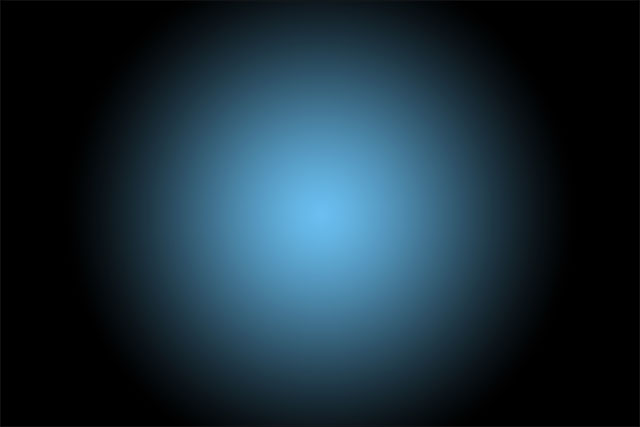
The aforementioned radial gradient with the colors reversed.
Angle
The Angle style (heart icon) is where things start to get interesting (although peradventure not quite as useful):
Selecting the Angle slope style.
Much like the Radial fashion, the Angle style also uses your starting betoken as the center of the gradient. But rather than transitioning outward in all directions, it wraps itself around the starting point in a counterclockwise way. I'll in one case once more press Ctrl+Z (Win) / Control+Z (Mac) on my keyboard to undo my last gradient. So, I'll draw the angle-style gradient the aforementioned mode as the radial gradient by clicking in the center of the certificate to set up the starting point, then dragging away from it:
Drawing an angle-fashion gradient from the center.
Here'due south what the bending style looks similar when I release my mouse button. Every bit with all of Photoshop'southward gradient styles, selecting Opposite in the Options Bar would give you the same result but with the colors swapped:
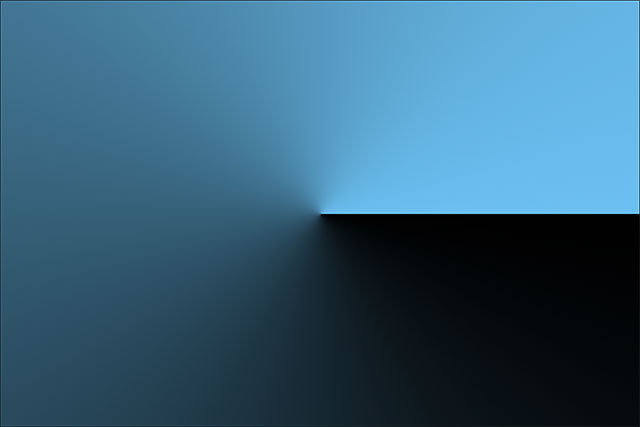
The bending mode wraps the slope around your starting indicate counterclockwise.
Reflected
The Reflected style (fourth icon from the left) is very similar to the standard linear style, but it goes a step further by taking everything on one side of your starting bespeak and mirroring it on the other side:
Selecting the Reflected slope style.
Hither, I'm clicking in the center of the document to set my starting point, then dragging upward:
Cartoon a reflected-style gradient.
When I release my mouse push button, Photoshop draws a standard linear gradient in the top half of my document between my starting and cease points, but then mirrors it in the bottom one-half to create the reflection:
The reflected-style gradient.
Here's what the reflected gradient would wait like with the colors reversed:
The reflected-style slope with Reverse selected in the Options Bar.
Diamond
Finally, the Diamond gradient manner transitions outward from your starting betoken, similar to the Radial fashion, except that it creates a diamond shape:
Selecting the Diamond gradient style.
I'll again click in the center of my document to set up the starting signal and then drag away from information technology:
Drawing a diamond-style gradient from the eye.
When I release my mouse button, we get this interesting diamond shape:
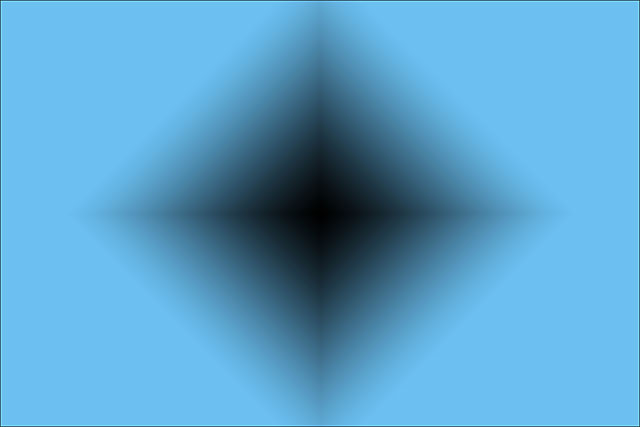
The diamond-style gradient.
In this case, I think the diamond shape looks better with the colors reversed, but of course it volition depend on the colors you've chosen for the gradient and how information technology'south existence used in your pattern our layout:
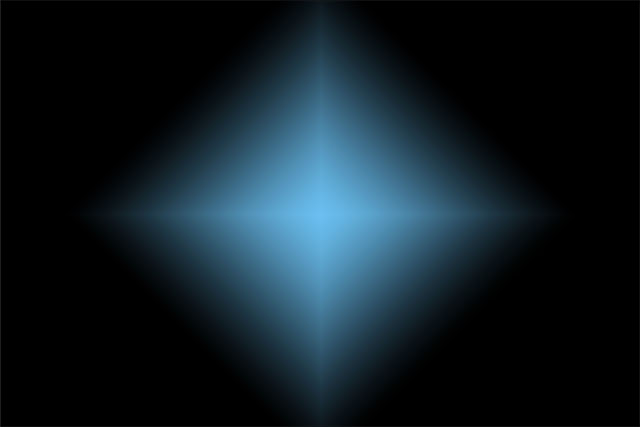
The diamond gradient with the colors reversed.
The Dither Option
1 terminal option we should wait at in the Options Bar is Dither. With Dither selected, Photoshop volition mix a chip of dissonance into your gradients to help polish out the transitions between colors. This helps to reduce banding (visible lines that course between colors when the transitions are non shine enough). The Dither selection is turned on past default and you'll ordinarily desire to leave information technology selected:

The Dither option helps reduce ugly banding between colors.
The Mode And Opacity Options
There's a couple of other Gradient Tool options in the Options Bar that nosotros'll relieve for another tutorial because they become a bit across the basics. Both the Mode choice (short for Alloy Fashion) and the Opacity option bear on how the slope volition blend in with the original contents of the layer. If you're familiar with layer blend modes, gradient blend modes work much the same manner, while the gradient opacity option works much like the Opacity option constitute in the Layers panel. In most cases, you'll want to leave them ready to their defaults, but again, we'll encompass these 2 options in detail in their own separate tutorial:

The Mode and Opacity options.
Where to go next...
And at that place we take it! In this tutorial, we learned the basics of how to describe gradients in Photoshop with the Gradient Tool. In the next tutorial, we'll learn how to edit and save our own custom gradients using the Gradient Editor! Visit our Photoshop Basics section to acquire more virtually Photoshop!
Source: https://www.photoshopessentials.com/basics/how-to-draw-gradients-with-the-gradient-tool-in-photoshop/
Posted by: arendsdred1964.blogspot.com
0 Response to "How To Get A Gradient Border In Photoshop"
Post a Comment